Updated on by Rita Moreira
Few effects stop people in front of a pencil drawing like water: a drop rolling down a cheek, condensation on glass, wet hair clinging to skin. The drawing suddenly looks touchable, and the artist looks like a magician. I promise you there is no magic in it, only a small set of light effects repeated with patience.
In this tutorial we will take a single water drop apart, name its four visual elements, and then build one from scratch, step by step. By the end you will also know how to place drops on skin and petals, and how to practise so the effect holds up inside a full portrait.
How do you draw water drops?
A water drop is drawn by reading light rather than following a fixed recipe: you draw the bright catchlight where light strikes the surface, the curved form shadow on the opposite side, the cast shadow the drop throws on the surface beneath it, and the subtle refraction that distorts whatever sits behind the water. See those four elements clearly and any drop becomes drawable.
That order of thinking matters. The question is never “how do I make a drop?” but “what am I actually seeing in my reference?”. A drop is nothing more than light and shadow at a reduced scale, which is why the fundamentals in my guide to light and shadow drawing are the real prerequisite here.
What are the four parts of a realistic water drop?
Every convincing drop, whatever its size or surface, contains the same four elements. When a drawn drop reads as a smudge instead of water, one of these is missing or misplaced.
| Element | What it is | Where it sits |
|---|---|---|
| Catchlight | Intense point of reflected light, usually clean paper | On the side facing the light source |
| Form shadow | The drop’s own shadow, curved with its rounded shape | Inside the drop, away from the light |
| Cast shadow | Shadow the drop throws onto the surface below | Under the drop, stretched away from the light |
| Refraction | Distortion of the pattern behind or beneath the water | Within the body of the drop |
The catchlight deserves special respect: it is the single brightest point in the effect, and it works best preserved or lifted rather than painted on. My guide to white highlights in drawing covers the options in detail, from careful reserving to precision erasers.
How do you draw a water drop step by step?
Start big and simple: when I demonstrate this in class I draw the first drop the size of a two pence coin, on a flat surface, with one clear light source. Here is the sequence.
- Outline lightly: a slightly irregular oval or teardrop, drawn so faintly you can lose it later. Perfect symmetry looks artificial.
- Fix the light direction: decide where the light comes from and keep every later decision loyal to it.
- Lay the midtone: shade the surface tone across and around the drop, slightly lighter inside its body.
- Build the form shadow: a curved dark band inside the drop, following its roundness on the side away from the light.
- Add the cast shadow: a soft dark shape hugging the base and stretching away from the light. This is what anchors the drop to the surface.
- Lift the catchlight: one crisp bright spot on the lit side, cut out with a precision eraser.
- Let the base glow: look closely at a real drop and you will often find the darkest tone on the lit side and a glow near the bottom, because water bends light like a tiny lens. Draw what you observe, not what logic expects.
- Sharpen the edges: a firm edge where drop meets surface, softer transitions inside. Blurry outlines kill the glassy feel.
No special kit is needed: graphite pencils from HB to 8B cover the full range of tones. For step 6, an eraser pen is the right tool; the MONO zero from Tombow, the Japanese maker founded in 1913, has a 2.3 mm tip made for exactly this scale of highlight. Smooth surfaces such as Bristol board give the crispest finish, and Daler-Rowney, producing art materials in England since 1783, makes an accessible one; Jackson’s Art and Cass Art stock all of this online, Hobbycraft in person, and Amazon.co.uk has the basics.
How should you practise before adding drops to a drawing?
In a controlled environment first. Fill a sheet with shaded spheres until the basic 3D illusion is automatic: a sphere is a water drop with the transparency removed, and the exercise trains exactly the volume skills that make drawings look 3D. Then draw medium-sized drops on plain surfaces, a leaf, a pane of glass, a smooth wall, practising all four elements each time.
Only then bring drops into a portrait. The mistake I see most in my students is the reverse order: they attempt a tear on a finished face before the effect is consolidated, and the drop argues with the rest of the drawing instead of belonging to it. Water must obey the same light as everything else on the page, which is the core discipline of realistic pencil drawing.
How do you draw water drops on skin?
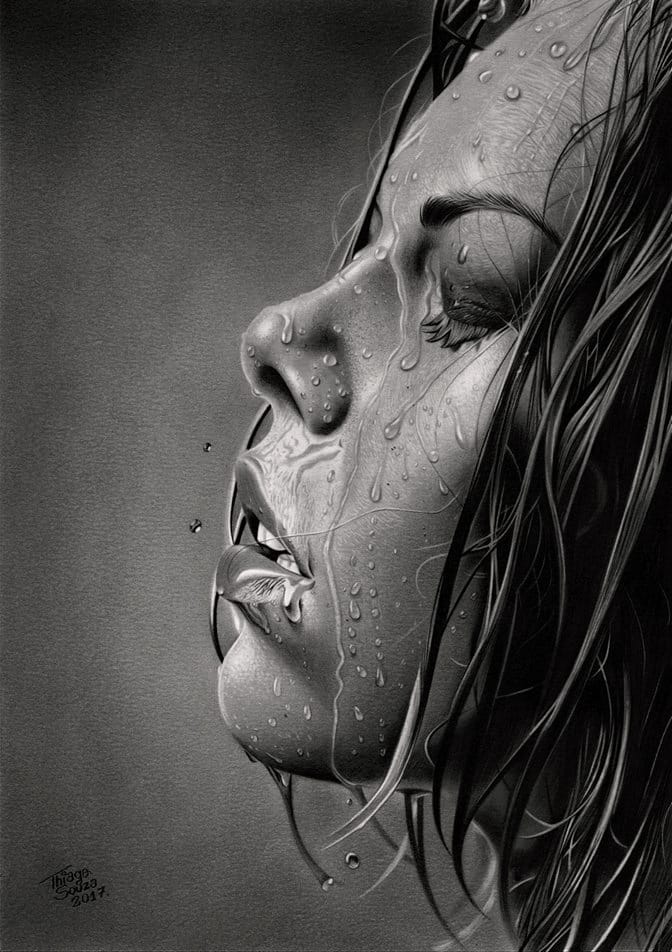
Drops on skin follow the same four elements, with two extra demands. The refraction now distorts pores and fine lines, so the skin under the drop is drawn slightly magnified and darker; and the wet area reflects more light than dry skin around it, so trails and drips get their own thin highlights. Building believable pores first is half the battle, and my guide on how to draw skin texture covers that foundation.
This combination of wet effect over living texture is what hyperrealists such as the German artist Dirk Dzimirsky push to its limit, and it is less far away than it looks: every dramatic wet portrait is dozens of small drops, each built from the same four elements. If you would like the whole path through skin, faces and their textures laid out in order, my step-by-step ebooks exist to take you from your first shaded sphere to effects like this without guesswork.
Frequently Asked Questions
How do you draw water drops on flowers?
Follow the petal, not the formula. On a curved petal the cast shadow bends with the surface, and drops elongate as they sit on a slope, so draw ovals stretched in the direction of the tilt rather than neat circles.
The refraction is your best friend here: inside the drop, the petal’s veins appear slightly magnified and darker, and showing that distortion sells the transparency instantly.
Keep the catchlight small and crisp. On soft organic surfaces, an oversized highlight is the quickest way to turn water into plastic.
How do you draw water drops with coloured pencils?
Use the same four elements, with colour discipline. The body of the drop takes the local colour of the surface beneath it, one or two shades darker, and the form shadow is a deeper version of that same hue rather than grey.
Preserve the catchlight as clean paper if you can; a white gel pen can rescue it afterwards, but reserved paper always looks brighter.
Finish by burnishing the drop with a colourless blender so the water reads glassy against the softer texture around it.
What is the easiest way to draw a water drop?
One large drop, one light source, three tones. Draw a soft oval the size of a coin, shade a midtone over it, add one curved dark band inside and one soft shadow beneath, then lift a single bright catchlight.
That minimal version already reads convincingly as water, and it takes most of my students under ten minutes at the first attempt.
Scale down only once the big version works: small drops are the same drawing with less room for error, so earn the miniature.
Did this article help you? You can buy me a coffee so I can keep creating free guides like this one.