Updated on by Rita Moreira
There is a particular frustration that arrives a few months into drawing: you are no longer a beginner, your sketches are recognisable, and yet the work has stopped improving. You practise, but you plateau. In my experience teaching realistic drawing, that plateau is rarely about effort; it is about practising the same comfortable things instead of the specific techniques that unlock the next level.
This guide is for people who already draw. We will go through the seven pencil techniques that professional realistic work is built from, then turn them into an improvement plan: which one to tackle first, how to practise it so it sticks, and how to tell when it is time to move on.
How do you get better at drawing?
To get better at drawing, work through seven core pencil techniques one at a time: guidelines for accurate sketches, smooth shading, even patches of tone, hair and fur strokes, face construction, the liquid droplet effect and blending. Each rewards focused practice on its own, and together they cover almost everything a realistic pencil drawing demands.
One boundary before we start: this is an improvement plan, not a first-steps guide. If you have never drawn seriously, begin with my roadmap on how to learn to draw as an adult and come back here once the basics feel familiar. And if you want the theory underneath all seven techniques, the guide to realistic pencil drawing maps the fundamentals they rest on.
What are the 7 pencil techniques that improve your drawing?
Here they are in the order most people should acquire them. Notice how the first three are foundations and the last four apply those foundations to the subjects that actually fill your sketchbook.
- Guidelines. A few light horizontal and vertical anchor lines keep your proportions honest while leaving the sketch itself freehand. Of all the accuracy aids, this one preserves the most observation, which is exactly the muscle you are trying to build.
- Smooth shading. Master soft, even layers before chasing deep shadows: HB for the midtones, 2B for transitions, and 4B or 6B only in the darkest zones. Darkness is the work of many light layers, never of pressure. The theory behind where each value belongs lives in my guide to light and shadow in drawing.
- Even patches of tone. A well-made patch shows neither individual pencil strokes nor the sparkle of untouched paper grain. The recipe is a sharp point, constant light pressure and strokes in one uniform direction; smoother paper helps, and blending finishes the job.
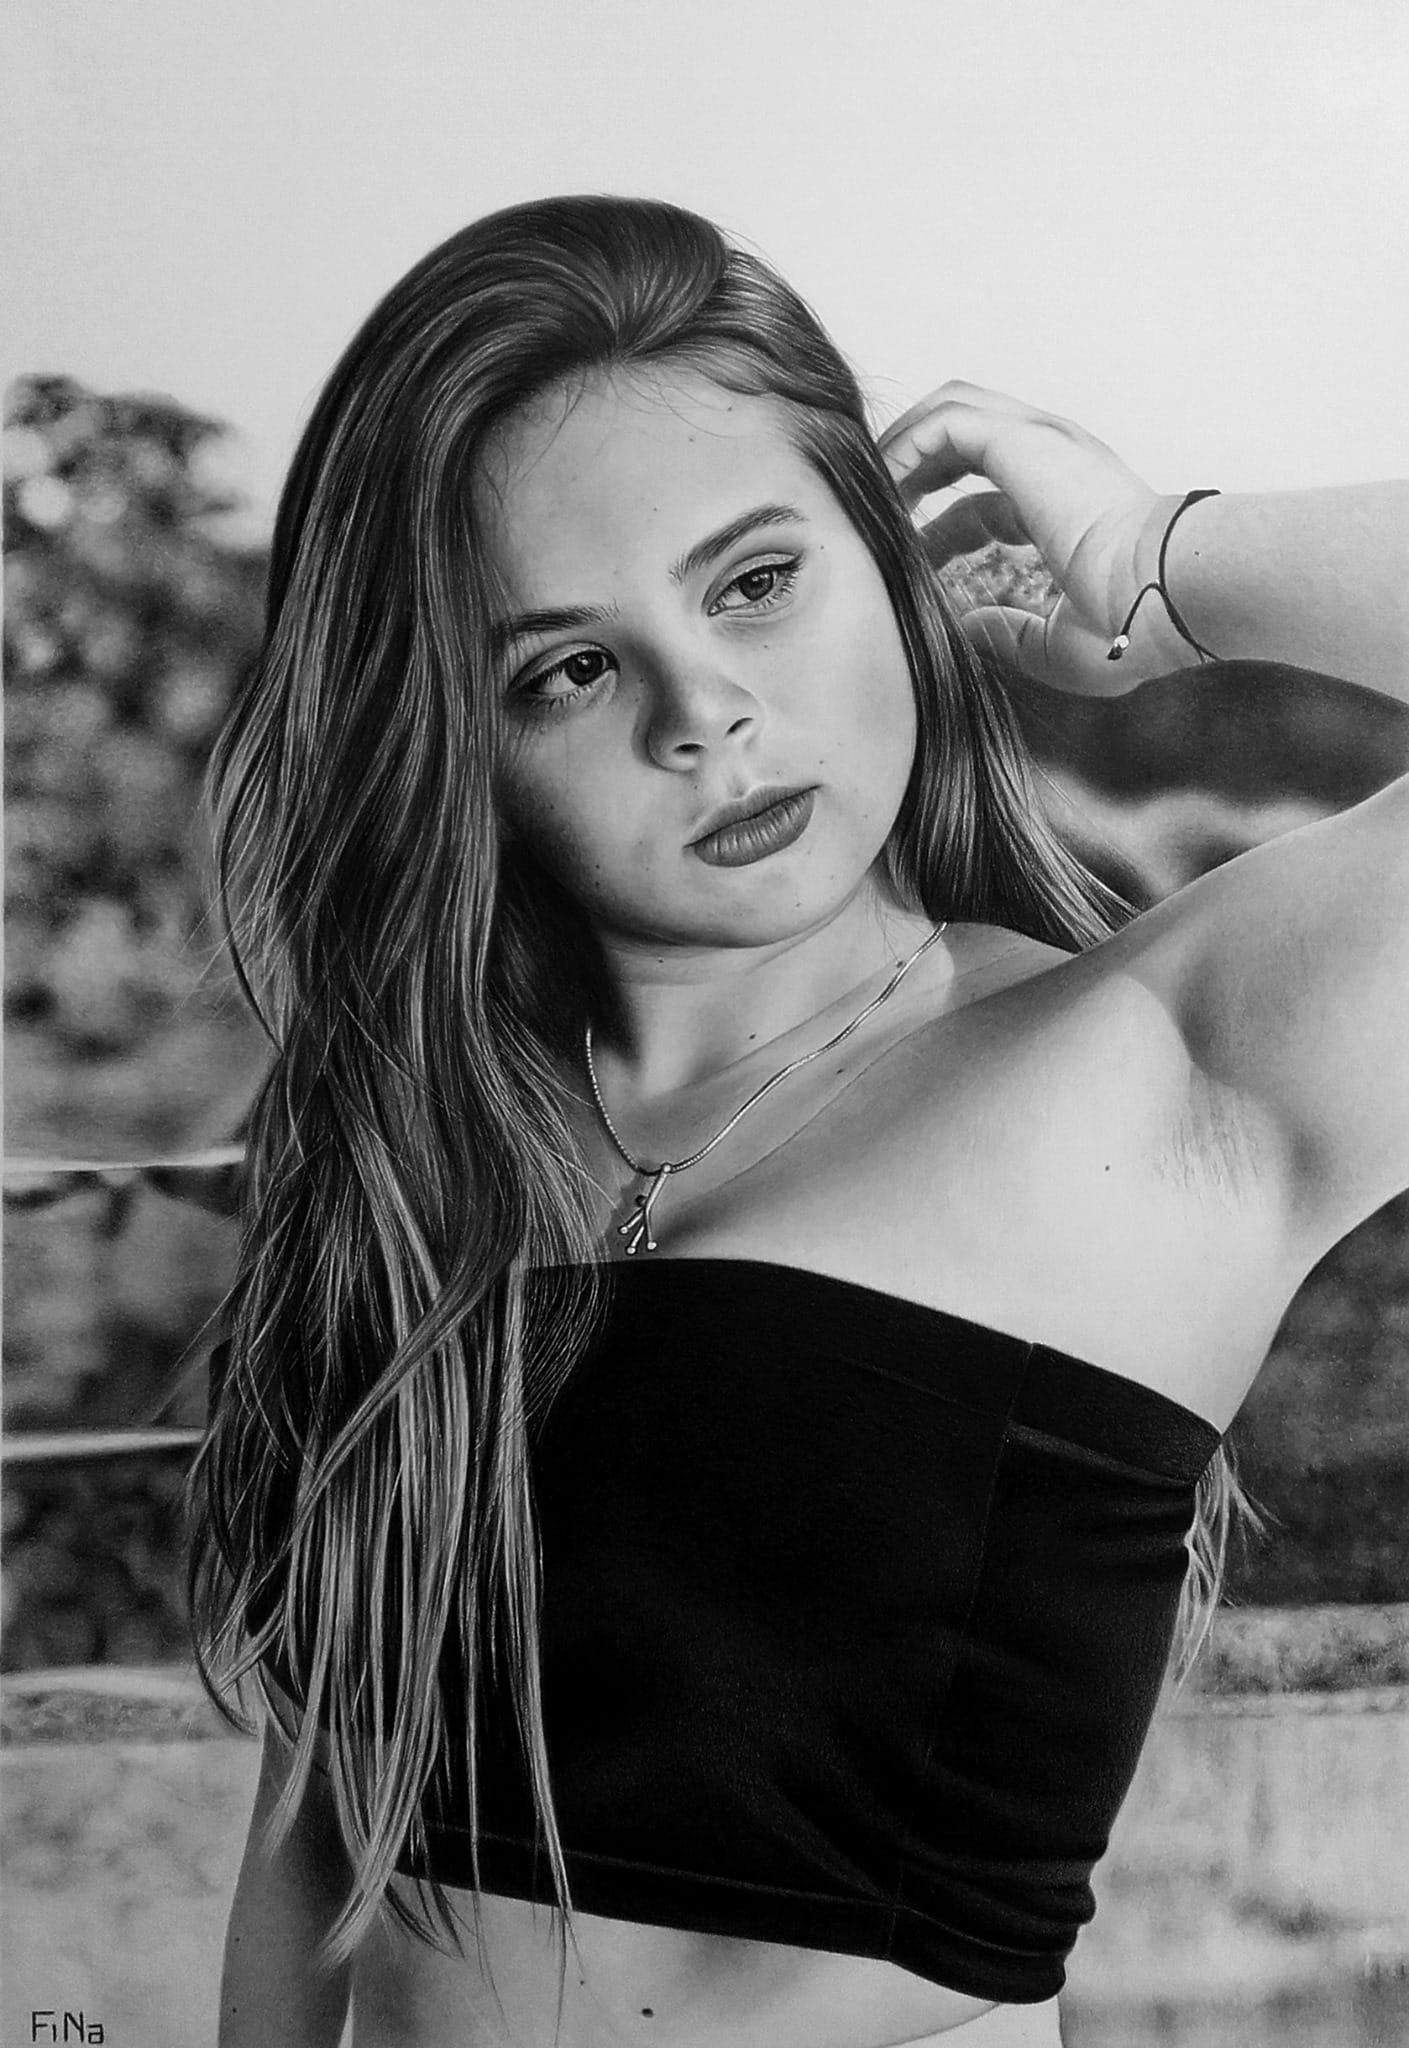
- Hair and fur. Strokes must start and end thin, laid over a soft grey base, with a fine eraser pen pulling out bright strands and a mechanical pencil darkening the deep ones. Never cross individual strands at random, and finish with a soft brush to integrate the shadows.
- The human face. Faces forgive nothing, so the construction order matters: head shape, proportion lines, eyes and brows, nose, mouth, hair, neck, and overall shading last. Starting with a detail you love, usually an eye, is the classic way to wreck the proportions of everything around it.
- The liquid effect. A convincing water droplet is a system of four visual elements: an intense highlight, a form shadow, a cast shadow and the refraction of the surface beneath. Practise each element on isolated droplets before you let them loose on a portrait.
- Blending. Different tools serve different scales: a blending stump for small areas, a tissue for large expanses, a brush for dense dark passages. Most finished drawings use all three, always following the direction of the original strokes.
Several of these lean on your equipment behaving predictably, which is why graded pencils exist: Faber-Castell’s Castell 9000, the classic reference pencil, comes in 16 hardness grades precisely so that each shading zone can have its own tool. And since faces are where most improvers are heading, my step-by-step ebooks turn technique five into a complete guided journey, feature by feature.
Which technique should you work on first?
Match the technique to your level instead of grazing all seven. If your foundations wobble, spend your time on guidelines, shading and tone patches: nothing built on top of them works without them. If those feel solid, move to hair, faces and the liquid effect, which is where realism starts to impress. If your drawings are accurate but lack polish, blending and texture control are your next frontier.
When a student cannot tell where their own weakness lies, I send them to a diagnosis first: my checklist on why your drawings look bad pinpoints which of these techniques is actually failing, and my guide on making drawings look 3D covers the most common culprit, weak value structure, in depth.
Then commit properly: pick the one technique you have been avoiding and give it 30 days of short, focused sessions. The technique that feels hardest is almost always the one you have practised least, and a month of honest attention on it moves your work further than a year of drawing around it.
On materials: you likely own everything already, and the extras here are cheap. A blending stump, an eraser (rubber) with a fine point and a soft brush are stocked by Jackson’s Art, Cass Art and Hobbycraft, as well as Amazon.co.uk, and UK makers such as Derwent cover the full graphite range.
Frequently Asked Questions
How do you get better at drawing for beginners?
Concentrate on the first three techniques only: guidelines, smooth shading and even patches of tone. Without those, none of the showier skills will hold together.
Keep the subjects humble, single objects under one light source, and keep the sessions short and regular rather than long and occasional.
Resist the urge to sample all seven techniques in your first months. A beginner who shades one egg well has learnt more than one who has attempted hair, faces and droplets without foundations.
How do you get better at drawing people and anatomy?
Shapes and proportion first, anatomy later. A figure drawn as cylinders and spheres with correct proportions will always beat an anatomically informed figure with broken construction.
Practise measuring relationships against your reference: how many head lengths tall the figure is, the angle of the shoulder line, where the elbow sits against the waist. Those checks catch most errors early.
Bring in anatomy study once you are intermediate, and make it purposeful: learn the specific structure that keeps going wrong in your figures, not the whole medical atlas at once.
How do you get better at drawing faces?
Respect the construction order and practise features in isolation. Build every face from the structural sketch outwards, head shape, proportion lines, then features, and separately fill sketchbook pages with single eyes, noses and mouths until each stops intimidating you.
Most face problems are proportion problems in disguise, so when a portrait looks wrong, check the feature placement before reworking the shading.
Finally, be patient with skin and hair: they are layer-hungry, slow textures, and rushing them is what makes an otherwise correct face look unfinished.
Did this article help you? You can buy me a coffee so I can keep creating free guides like this one.