Updated on by Rita Moreira
Hair is where so many otherwise lovely portraits fall apart. You spend hours on the eyes and the skin, and then the hair goes on stiff and flat, sitting on the head like a helmet rather than growing out of it.
Here is the encouraging part: realistic hair has very little to do with drawing thousands of individual strands. It comes down to four habits of the hand, and with a bit of practice each one is entirely learnable. In this guide I will walk you through all four, then show you how to adapt them to different hair types.
How do you draw realistic hair with pencil?
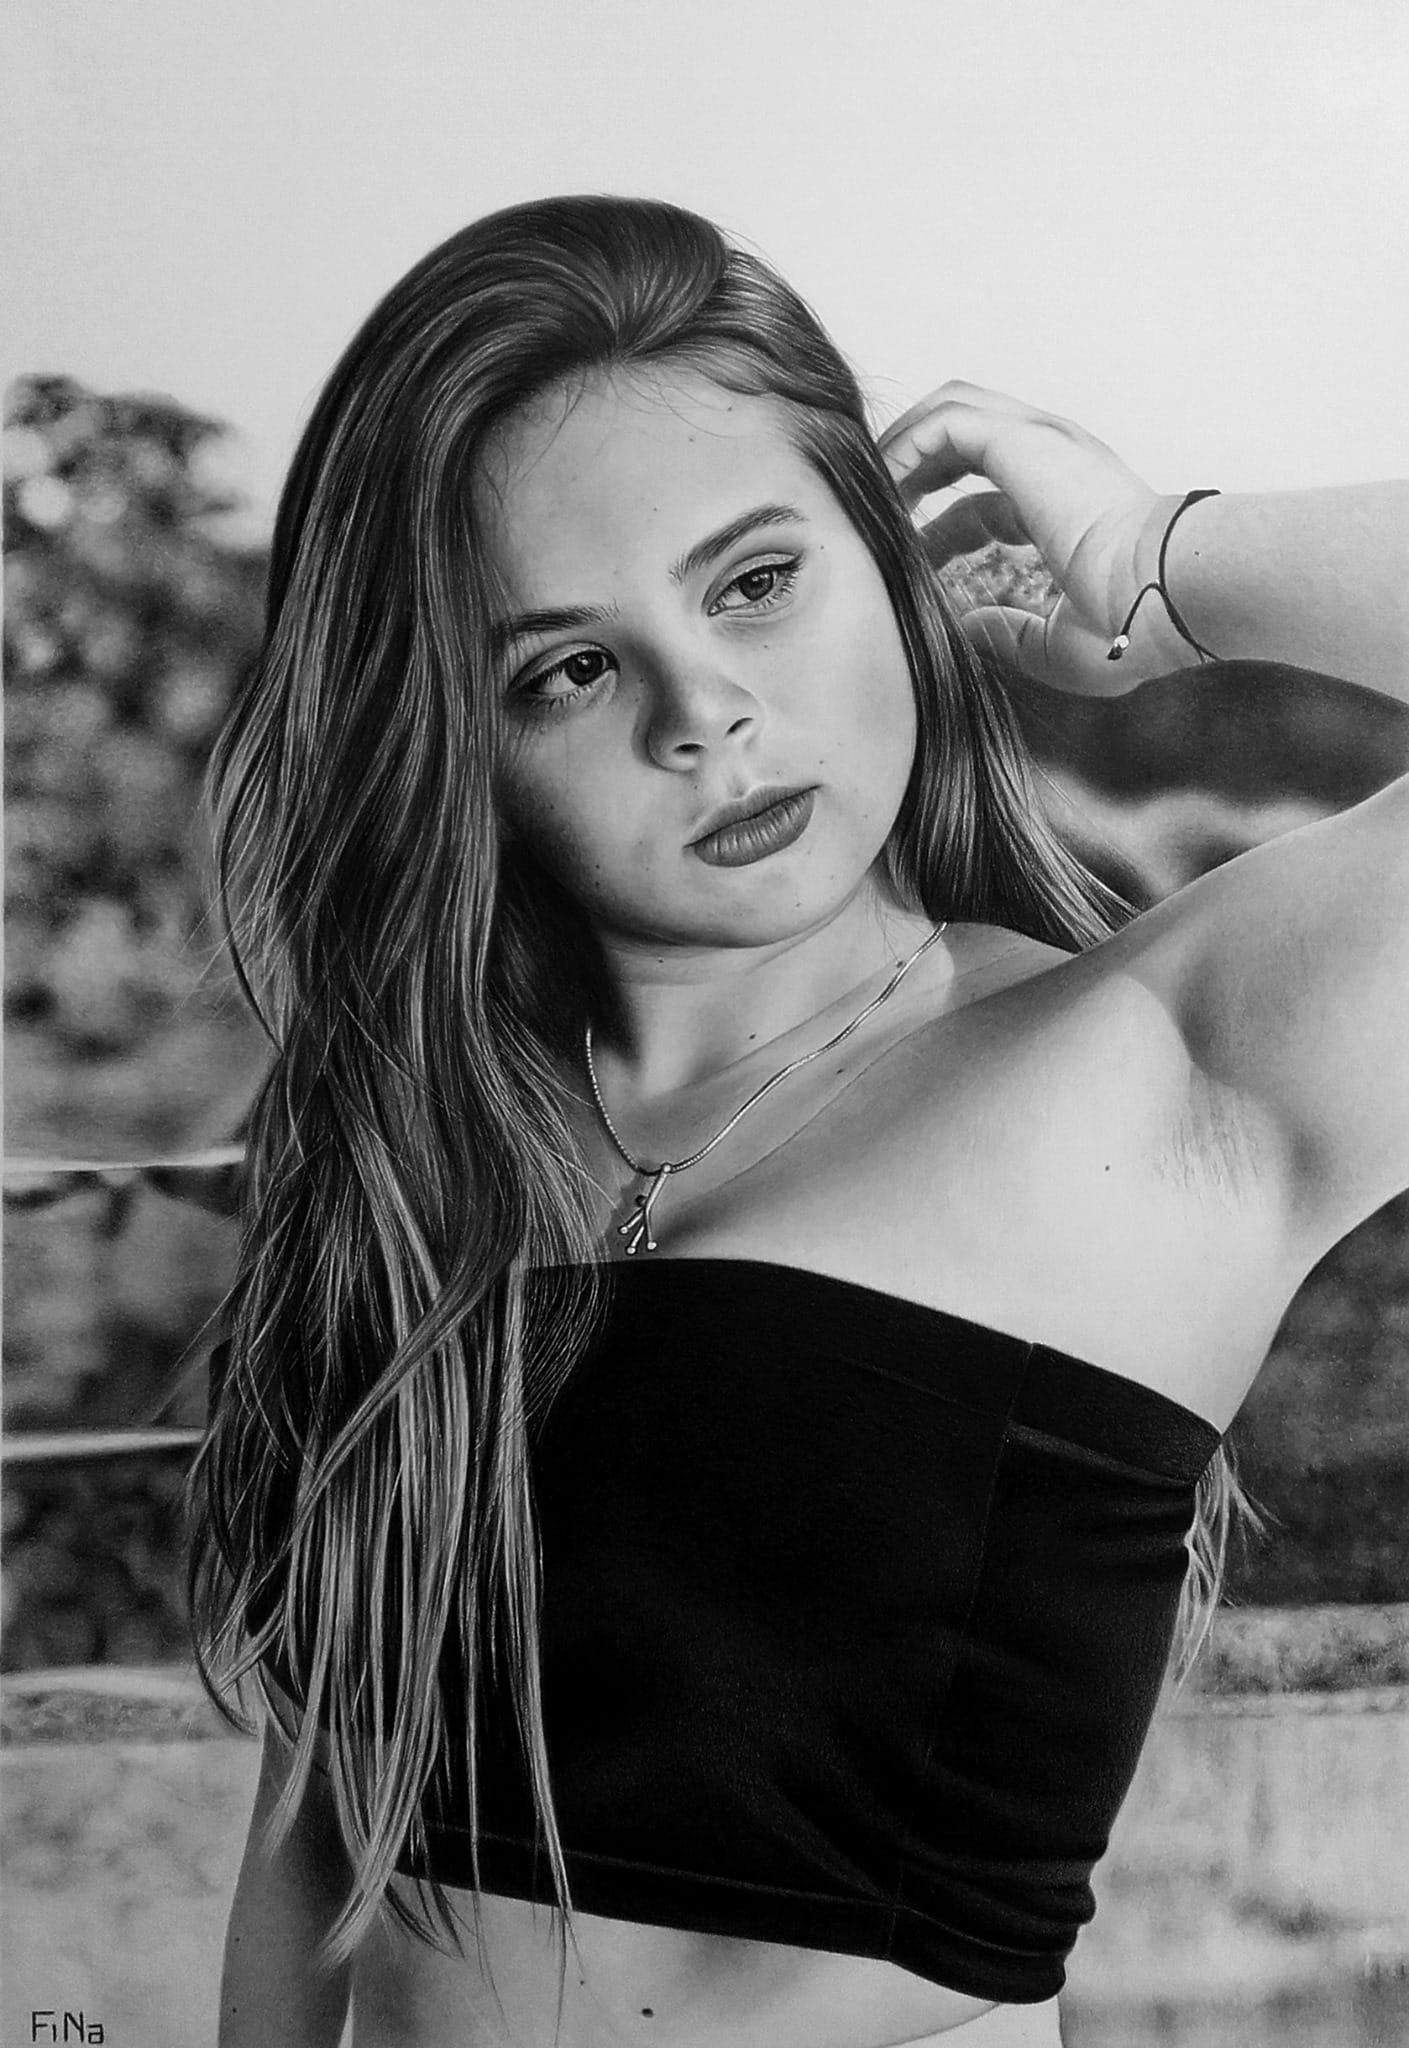
Realistic hair in graphite is built on four principles: light, tapered strokes so every strand starts and ends thin; a soft grey base that lets you work light and shadow into each section; an eraser pen for the bright strands and a mechanical pencil for the dark ones; and strokes that follow the natural flow of the hair without ever crossing each other.
A finishing pass with a soft brush then deepens the shadows and gentles the highlights, which is what pulls the whole thing together. The order matters more than the tools: you build the form of the hair first and add strand detail last, never the other way round.
If you are still getting comfortable with graphite itself, my guide to realistic pencil drawing covers grip, pressure and tonal values before you take on something as unforgiving as hair.
How to draw realistic hair step by step
Work through these four steps in order, because each one depends on the one before it. Skipping ahead to strand detail is the single most common reason drawn hair looks artificial.
- Keep every stroke light and tapered. Flick the pencil so each strand begins and ends thin, with no heavy dot at the root.
- Lay a grey base, then pull out light and shadow. Lift bright strands with an eraser pen and press dark ones in with a mechanical pencil.
- Finish with a soft brush. Deepen the darks and soften the lights so the tonal transitions become subtle.
- Never cross the strands. Let light and shadow separate the sections, not intersecting lines.
The mistake I see most often in my students sits in step one. They plant the pencil, press, and then pull the stroke, which leaves a thick blob at the origin of every strand. Picture the roots along a hairline: if you load the pressure right at the start, the whole parting ends up peppered with dark dots, and the harmony between root, middle and tip is gone.
For step two, shade a soft grey base over the entire section of hair before you think about any individual strand. That midtone base is what lets you work in both directions, as I explain in my guide to light and shadow in drawing: the lights are lifted out with an eraser (or rubber, as many of us grew up calling it) and the shadows are pressed in with graphite. For the lifting I use an eraser pen such as the Tombow MONO zero, whose 2.3 mm tip is fine enough to pull a single bright strand out of a grey base. The full technique is in my article on drawing white highlights, and it applies to hair almost unchanged.
For the dark strands, a mechanical pencil holds a constant fine point in a way a wooden pencil simply cannot, because a wooden tip rounds off after a few strokes and starts fattening every strand. I keep a 0.5 mm mechanical pencil loaded with 2B for most of the work and rotate it as I draw, catching the edge of the lead to keep the line crisp. Wooden pencils still earn their place in the base layer: the classic Castell 9000 range, made by Faber-Castell since 1905, runs from 8B down to 2H, and a soft 4B lays a quick, even grey without scratching the paper.
Step three is the one most beginners have never heard of. When I sweep a soft, dry brush over a finished section, the graphite in the shadows spreads and deepens while the lifted highlights lose their hard edges, and the tonal transitions suddenly read as hair rather than as pencil marks. It takes thirty seconds and changes the entire drawing.
Step four is the golden rule: strands within a section flow together and never cross one another. What separates one section of hair from the next is the play of light and shadow between them, not tangled lines. You can layer sections in front of or behind each other, always guided by your reference photo, but the moment individual strands start intersecting, the eye reads scribble instead of hair.
Shine follows the same logic, so do not treat it as a separate trick. A glossy band across the hair is simply a stretch where your lifted highlights cluster and the base grey almost disappears, framed by darker tone on either side. Place one band where the light source hits the crown, keep its edges soft, and resist adding more, because hair that gleams everywhere gleams nowhere.
Does the method change for male, female or curly hair?
The four principles stay exactly the same whether you are drawing a male or female subject; what changes is the length, curve and rhythm of your strokes. Short male hair is drawn with tiny tapered flicks, long straight hair with sweeping parallel strokes, and textured hair with shapes of tone rather than lines at all.
| Hair type | Stroke to use | Light and shadow pattern |
|---|---|---|
| Straight, long | Long, parallel, tapered strokes | Strong shadow between sections, one soft band of shine |
| Wavy | Extended S-curves | Alternating light and dark along each wave |
| Curly | Short, tightly curved strokes | Volume built in blocks, highlight per curl cluster |
| Afro | Tonal shapes, barely any lines | Broad shadow masses with small points of light |
| Short crop | Tiny flicks along growth | Scalp tone showing through at the edges |
Those tiny flicks for cropped hair are the same tapered gesture you use for eyelashes and eyebrows, which I break down in my tutorial on how to draw a realistic eye. And wherever hair meets the face, at the hairline, temples and sideburns, let the strokes fade gradually into the surface of the skin rather than stopping at a hard border; my guide to drawing realistic skin texture shows how the two textures hand over to each other, because in a portrait hair and skin succeed or fail as a pair.
If you want to take the whole head further, I have put my complete step-by-step guides to eyes, mouth, hair and skin texture into one practical resource with audio versions included, so you can study each feature properly instead of piecing tips together.
Where can you buy these materials in the UK?
Everything mentioned here is easy to find at Jackson’s Art or Cass Art online, at a Hobbycraft branch if you prefer to hold a pencil before buying, or on Amazon.co.uk. A Derwent sketching set, made in the Lake District since 1832, plus a 0.5 mm mechanical pencil and an eraser pen will cover this entire tutorial.
Frequently Asked Questions
Why is drawing hair so hard?
Hair is hard because beginners try to draw what they know is there, thousands of strands, instead of what the eye actually sees, which is sections of light and shadow. Drawing every strand produces a wig-like, artificial result.
The eye reads hair as realistic when defined strands appear only at the edges of each section, while the centres stay as soft masses of tone. Build the form first with a grey base and strong value contrast, add selective strands last, and the brain happily fills in the rest.
Can you draw realistic hair with coloured pencils?
Yes, and the four principles transfer directly: tapered strokes, a mid-tone base, highlights reserved early, and strands that never cross. The main difference is that coloured pencil is far harder to erase than graphite.
Since an eraser pen cannot rescue you, plan your bright strands from the start and leave them as untouched paper or fill them with your palest colour. Build the base in the mid tone of the hair, then work darker colours between the strand groups exactly as you would with graphite shadows.
How do you draw realistic hair for beginners?
Start with one small section of straight hair, not a whole head. Shade a soft grey rectangle, lift three or four bright strands out of it with an eraser pen, and darken the gaps between them with a sharp 2B.
That little exercise trains the flick, the value contrast and the no-crossing rule all at once. When I give it to my students, most produce a convincing strand group within an evening, and scaling up to a full head is then repetition rather than new skill.
Did this article help you? You can buy me a coffee so I can keep creating free guides like this one.